Layer Cake Quilt: Squares!
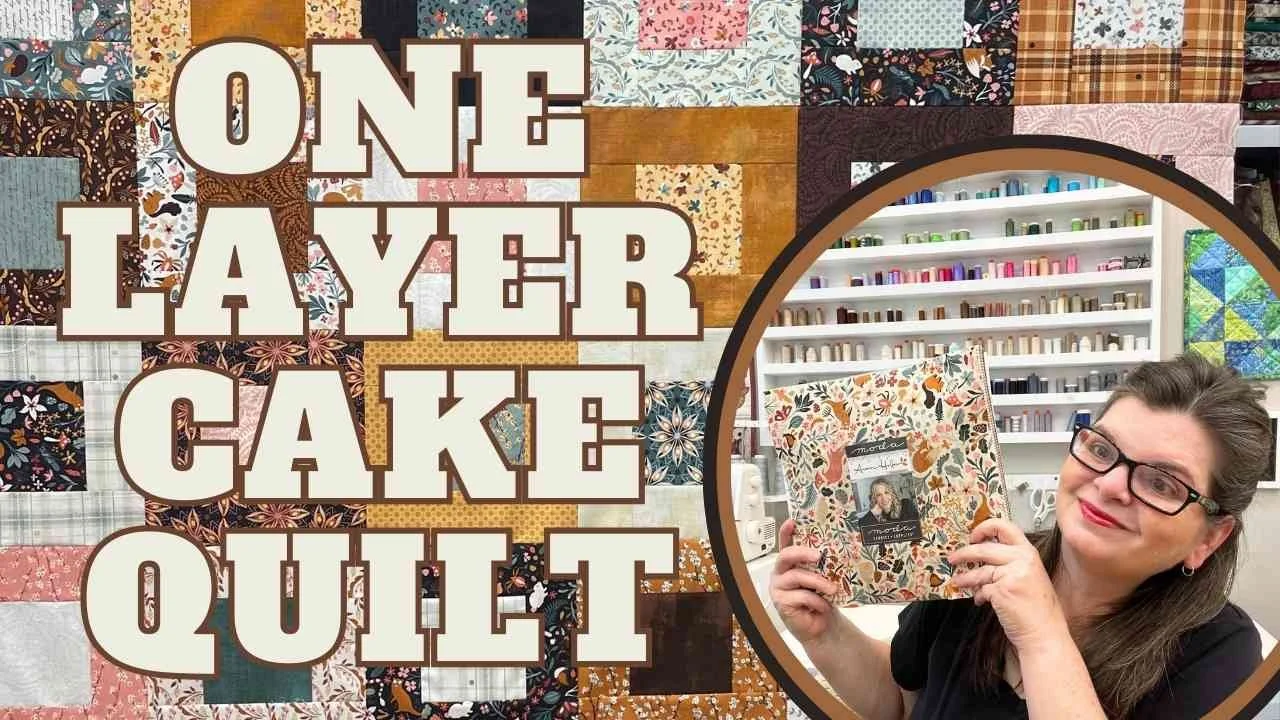
To see the video, click on the photo above or click HERE.
Want to learn to make a fast and super easy quilt out of just one layer cake? You are in the right place for this quilting tutorial! I will show you how to take just ONE layer cake (or set of (42) 10" squares) and make an amazing lap-size quilt. Come with me as I take you step-by-step in this easy quilt tutorial! I will show you all the tips and tricks that goes into making this one.
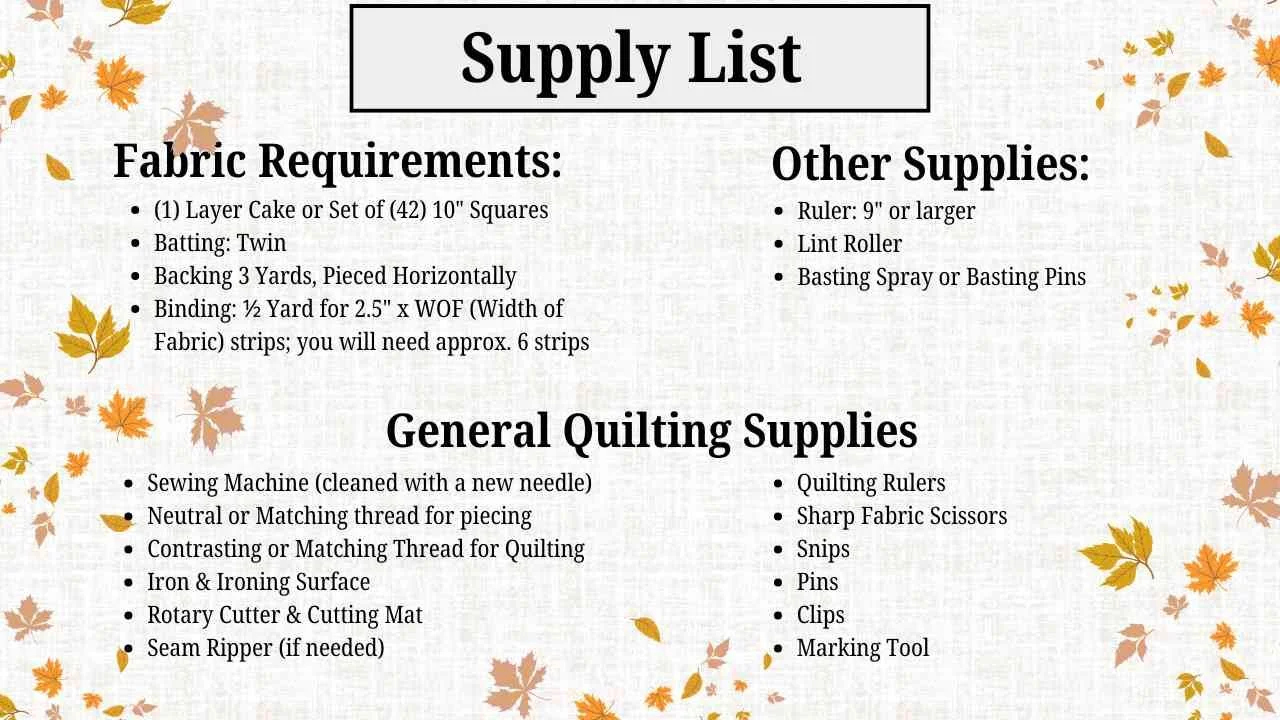
For this tutorial, I used Acorn Hollow by BasicGrey for Moda, but you can use any layer cake or set of (42) 10” squares. Heck, you can even use scraps! If you want ideas on how to make your own layer cake, I have a video on that! Click HERE to read the blog and click HERE to watch the video.

Step 1: Sort Fabrics into Background Colors
Sort the fabric squares into (21) sets of two. I like to make sure that the fabrics in each set are contrasting, which will allow for the pattern to show really well. I started by laying all of the fabric out and then sorting it into background fabrics. I then matched sets that were different backgrounds. Once I had the sets together, I started cutting out the pieces from each block.

Step 2: Cutting the Squares
After you have made (21) sets, it is time to cut! From each square, trim off the pinked edge on one side. Next, measure over 4.5” from the cut side and cut a strip that is 4.5” x 10”. After that, turn the 4.5” x 10” rectangle so it is horizontal on the cutting mat. Trim the pinked edge first, and then measure over 4.5” and cut a 4.5” square. Next, measure over 2.5” and cut. Repeat once more. You should have (1) 4.5” square, (2) 2.5” x 4.5” rectangles.
Next, take the remaining part of the square (5.5” x 10”). Lay it on your mat horizontally. Trim one of the pinked edges off the short side. From that short cut side, measure over 8.5” and cut. Next, rotate the unit so it is vertical. Measure over 2.5” and cut; repeat. You should have (2) 2.5” x 8.5” rectangles.
Repeat with the remaining square in the set. Repeat this process with all remaining sets. Keep the sets together, however.
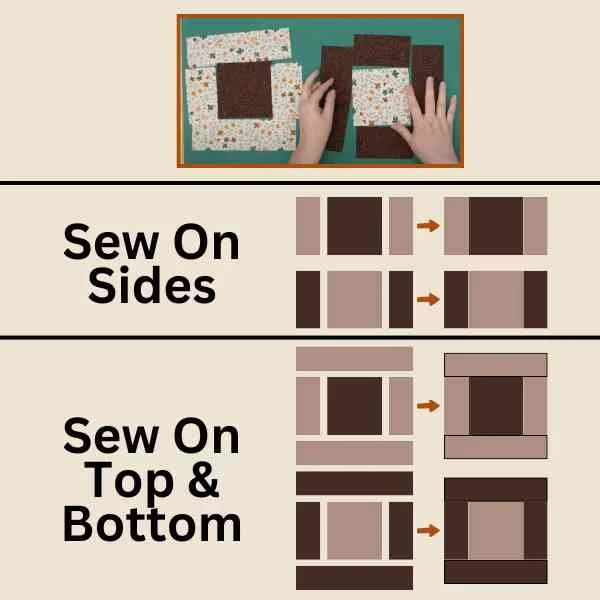
Step 3: Sewing the Blocks
Each set of two fabrics will make two blocks, just opposite colors. Once you have laid out both blocks (I suggest doing this because it is easy to get them mixed up), using a 1/4” seam allowance, sew the short rectangles to the right and left sides of the 4.5” square. Press seams open or to the dark fabric. Next, sew the long rectangles to the top and bottom of the center pieces. Press seams open or to the dark fabric. That’s it! The block is finished!
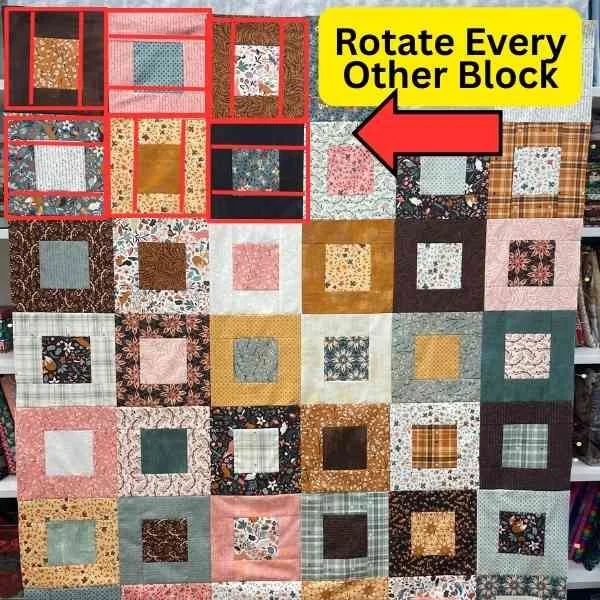
Step 4: Laying Out the Blocks
When all of the blocks are finished, you will have (42) 8.5” unfinished blocks. On a design board or the floor or table, layout the blocks this way: Six blocks across and seven rows. For ease of construction, rotate every other block. If it is done this way, you do not have to worry about seams matching. I love that!

Finished Quilt Top! YAY!
Once the quilt top is finished, press well and quilt as desired. I just ordered some backing fabric. I think I am going to quilt this in a plaid pattern with a few different thread colors. Stay tuned!
Number of Blocks Needed
Each block is 8” finished, so to calculate the sizes, you would multiply 8” by the number of blocks across and the number of rows. For example, if you have (6) blocks across and (7) rows down like in the Just One Layer Cake sample, you would have a quilt that is 49” x 56” (6 x 8 = 49; 7 x 8 = 56).
Here are some more sizes if you want to make it bigger:
49 Blocks: (7) blocks across and (7) rows would make a quilt that is 56” x 56”.
56 Blocks: (7) blocks across and (8) rows would make a quilt that is 56” x 64”.
64 Blocks: (8) blocks across and (8) rows would make a quilt that is 64” x 64”.
72 Blocks: (8) blocks across and (9) rows would make a quilt that is 64” x 72”
81 Blocks: (9) blocks across and (9) rows would make a quilt that is 72” x 72”.
90 Blocks: (9) blocks across and (10) rows would make a quilt that is 72” x 80”.
Let me know if you want more! I am happy to help!
Please let me know if you have any questions! As always, I am happy to help!
Happy Quilting!
Kris