Scrappy String Quilt
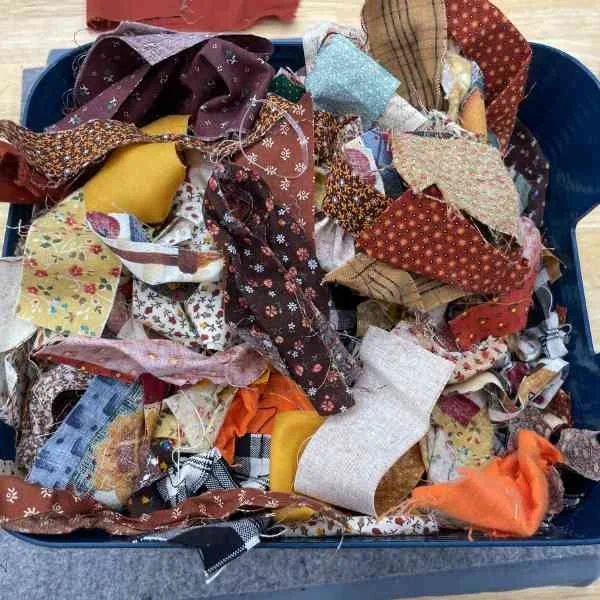
I bought these rag wreaths from a thrift shop this summer. I just loved all the fabric strips! I ended up making some coasters but wanted to make bigger blocks to make them into a quilt. Here’s how I did it:

To see the video tutorial, please click HERE or on the image above.

Quilt Inspiration
It all started this summer when I came across these rag wreaths at a thrift shop. I knew immediately what I was going to do with them—harvest the fabrics and make string quilts! I thought I only needed two (I should have bought them all!), but a few friends also bought the ones I left and gave them to me. I have the best friends!
Please note: You do not have to use scraps from a rag wreath to make this! You can use any scraps.
Preparing the Strips
After untying all of the strips, it was time to press them. This was a big job! I sprayed them with some water and started pressing and pressing and pressing. So of the strips were polyester or polyester blends, so I set those aside as I wanted to use 100% cotton fabric. I ended up getting about 200 strips per wreath. It was a lot of strips! I also supplemented with fabric from my own vintage fabric stash, making sure to use fabric that matched the 1970s/1980s print vibe.

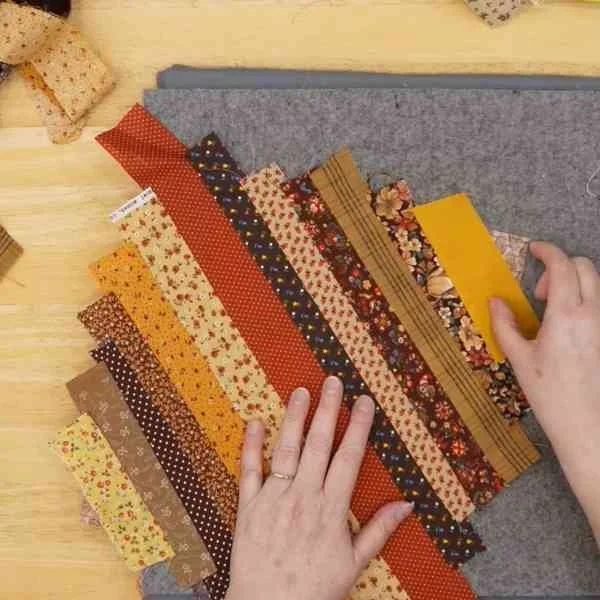
Cutting and Gathering Strips
The strips are sometimes called strings or noodles.
I like to use strips that are between 1.25” and 2”. Having a nice variety of widths will give you are nice scrappy feel to the quilt. As for the length, that depends on the size of the base you are using. It is important to make sure that you have some long strips that span the length of the block from corner to the opposite corner.

Decide on a Foundation
You will also need base fabric that is cut slightly bigger than the size you want. For example, I want 10” blocks so I cut my base fabric to 10.5”. This will make more sense when we trim the blocks down. Once the bases are cut, measure from corner to corner. This will be length you need for your longest strip. For this size, I needed a 15” middle strip.
Please note: You do not have to use fabric as a base. You can use paper or a light non-fusible interfacing, if you would like. I like using fabric because it gives the blocks a solid foundation. It does add some bulk, however, so make sure to be aware of that. If you do use paper, make sure to shorten your stitch length some, making it easier to remove the paper when you are finished making the blocks.

Add The First Strip
Starting in the center, place a strip or string from corner to corner with the right side of the fabric facing up. Next, place a second strip on top of the center fabric with right sides together. Sew down the one side of the fabric strips, sewing through the foundation as well. Make sure to use at least 1/4” seam allowance. After sewing, open and press the seam outward. Add another strip to the other side of the center strip, with right sides together. Repeat by sewing and pressing. Continue to add strips to each side until the square is covered.

Add The Second Strip
Next, place the next strip, pretty side facing down, on top of the middle strip lining up the edges. Sew 1/4” down edge of the strip going through the first strip, the second strip, and the foundation. After sewing, set the seam and press the strip out. Repeat this process by adding the third strip to the opposite side of the middle strip. Keep working out on each side, adding strips, pressing, adding more strips, until you reach the corners.

Keep Adding Strips
Keep working out on each side, adding strips, pressing, adding more strips, until you reach the corners. The number of strips needed will depend on the width of the strips and the size of your foundation. Adding a lot of strips will add interest to your scrappy blocks. For the ones I made, I used between 10 and 14 strips per block.
Corners
When you get to the corners, make sure that the fabric you are using is big enough that it won’t get lost in the seam allowance when sewing the blocks together after they are trimmed down. This will save you a lot of trouble and help with reduce the bulk of the blocks.

Press Well & Trim
This is an extra step and not necessary, but is something I like to do to ensure that the block is square and that the corners are included in the block. I turn the block over after pressing and trim down the extra pieces that are hanging over the edges. Set these aside for a future scrap project. Next, turn the square over so the right side is up. This is when I trim the block down to size, which for me is 10”. This allows me to make sure everything is lined up and contained in the desired block size.

Square Up Blocks
Once your edges are trimmed up, turn the block over to the front to square up the block and make it the size you would like it to be. To do this, I like to use a square ruler that is larger than the block. In the example I show in the video, I want the block to measure 10” x 10”, but I made my foundations slightly larger at 10.5” x 10.5”. To trim this block down to 10” x 10”, I turned the block over with the pretty side facing up. I placed the ruler on the block, making sure that it is hanging over the 10” marks on the bottom and the left side as shown. Next, I trim the top and the left side. After these are trimmed, I rotate the block so the top right corner is in the bottom left corner. Line up the 10” mark and trim the top and right side down to 10” square.

Laying Out the Blocks
There are a few ways to lay out the blocks. Personally, I like the look of the diamonds coming together, but play with these and decide what you like best. They are so much fun and rewarding to make! When sewing them together, make sure to press the seams open. There is a lot of bulk with the strings and the background fabric, if you used fabric instead of paper. Opening the seams will allow this to lay flatter and make the finishing process easier!

Alternate Layout
This is a cool layout, too! There are so many variations! Have fun playing with these blocks, trying different colors, layouts, and projects! It is so rewarding to take scraps like these and make something beautiful out of them!