Potato Chip Quilt Block
This block measures 12.5’’ unfinished (not in a quilt) and 12’’ finished (sewn into a quilt). It is easy, fun, and a little addictive to make. So gather your scraps and let’s get started!
I also have a tutorial on this block in my Christmas Quilting in July 2026 series. I show you exactly how to make this, step by step in the video tutorial! You can also get the full quilt pattern for FREE by signing up for my Christmas Quilting in July 2026 newsletter. Click HERE to sign up.
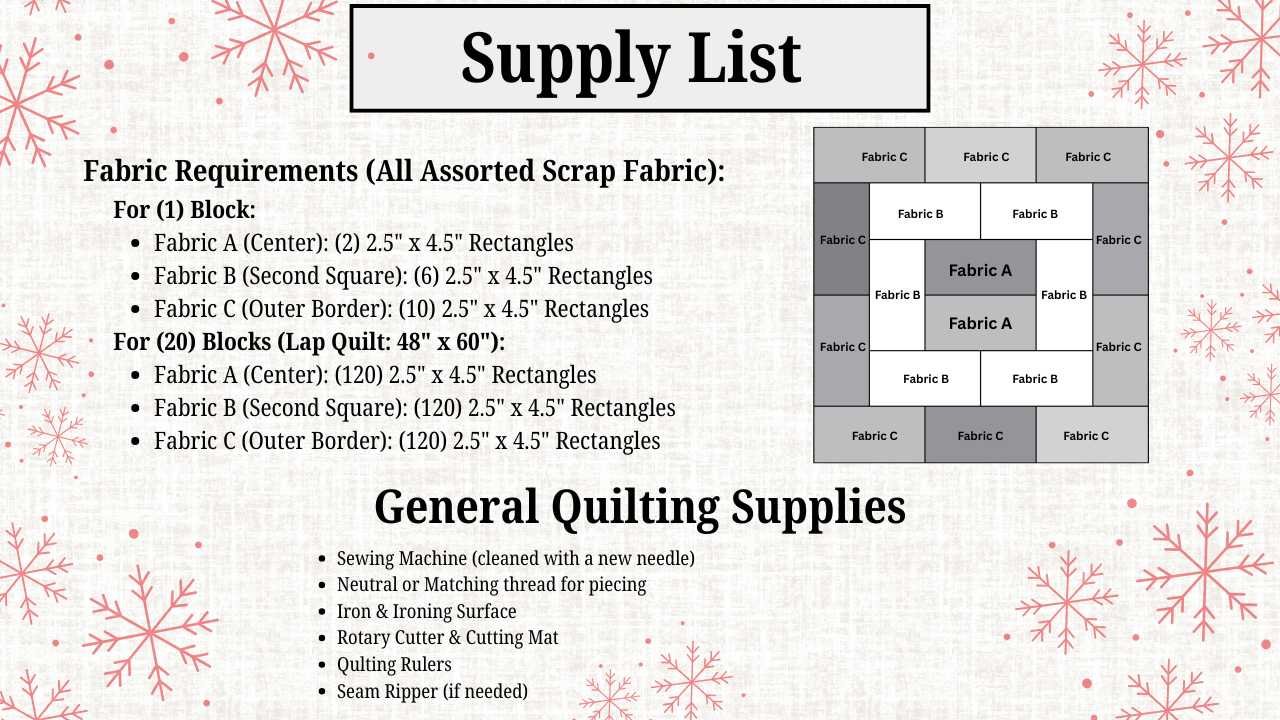
Supply List
About the Blocks
This quilt block was originally called Broken Courthouse Steps, but many people have adopted the name Potato Chip Block because you can’t just make (eat?) one of these, and it is true. This is a super fun block! There are many variations to this block depending on color placement and size of the rectangles used (called bricks). For the Holiday Crunch Time quilt, I used two different variations of the same layout. In this blog, I will show how to make one of these (red center and green outer square). For the pattern itself, you will make 10 of each variation: 10 with green centers and 10 with red centers, for a total of 20 blocks (4 blocks in each row and 5 rows in the quilt).
If you want to use 2.5’’ strips, you can get (9) 4.5’’ rectangles from one 2.5’’ x width of fabric strip.
If you want to use a jelly roll, you will just have enough to make this. You will need (14) strips from each color.
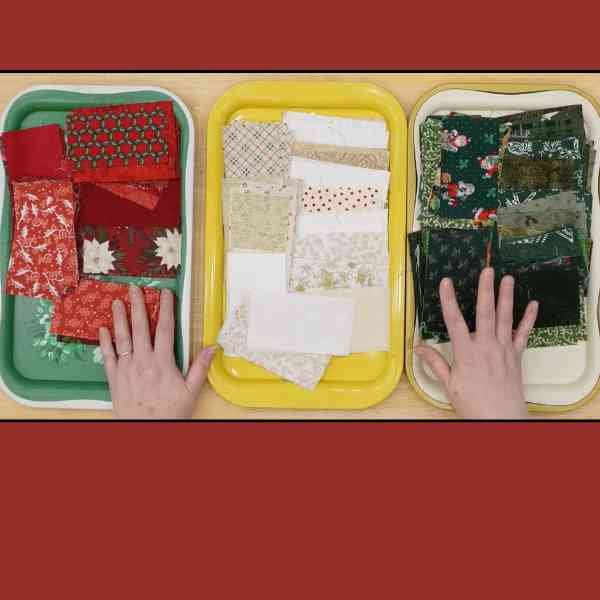
Step 1: Picking Fabrics
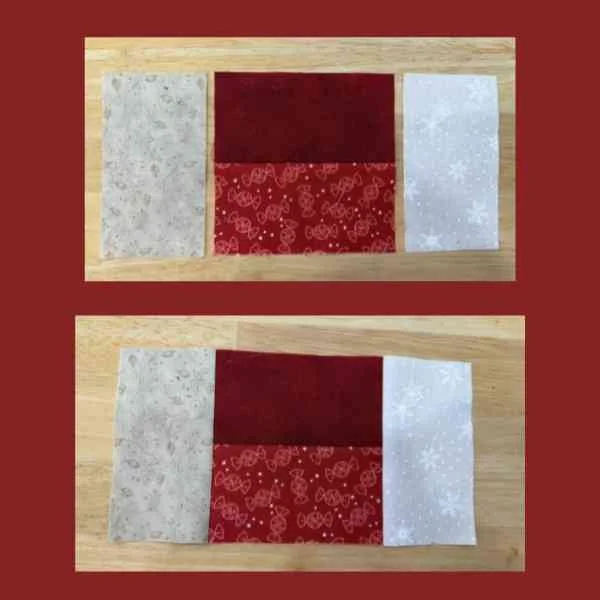
When it comes to picking fabrics for this project (or any scrappy project really), I like to make a rule for myself. For me, it helps to have at least one consistent element to tie the blocks together. In this block I am showing here, I have three rules: the center units will be red (Fabric A); the next or middle units will be beige/white (Fabric B); and the final outer units will be red (Fabric C).
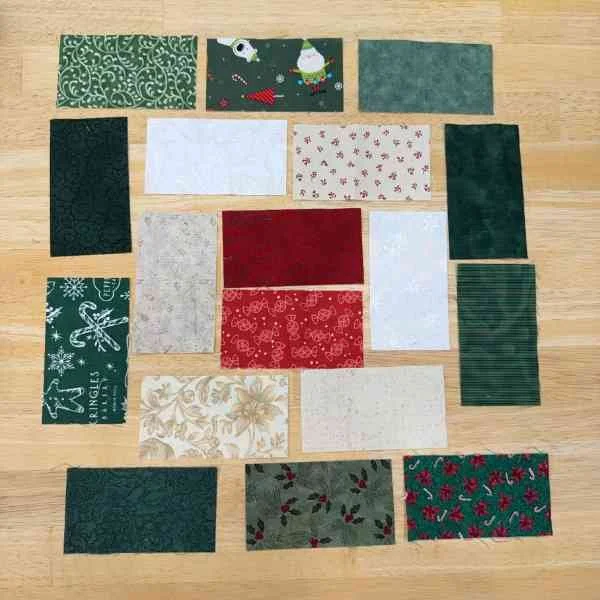
Step 2: Laying Out Block
It is a good idea to lay out the block first, but you don’t have to. I like to get an idea of what it will look like when it is put together. If you do decide to lay it out first, you will notice everything doesn’t look like it goes together because the seam allowances aren’t sewn into the block. Trust the process here. It will come together. I promise!
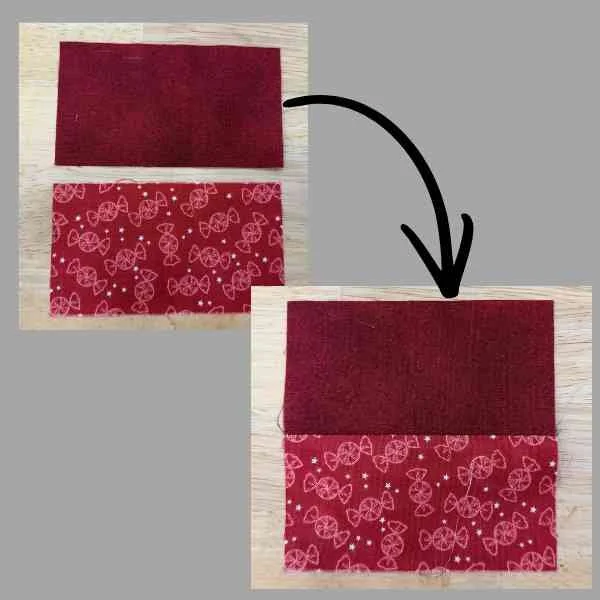
Step 3: Sewing It Together
Gather (2) Fabric A rectangles. Sew them together along the long sides of the rectangles as show. Optional: Press seams open.
Step 4: Adding Side “Bricks” or Rectangles
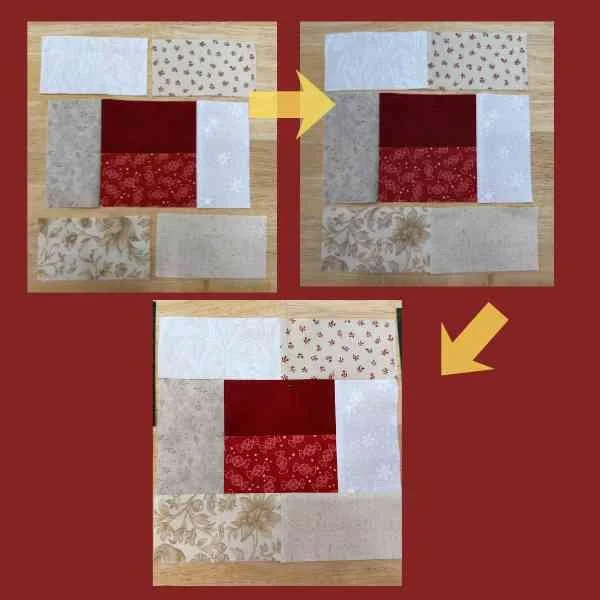
Gather (2) Fabric B rectangles. Sew one to each of the shorter sides of the unit from Step 3 as shown. Press seams open or toward the Fabric B rectangles.
Step 4: Adding Top and Bottom Bricks
Gather (4) beige/white rectangles. Sew (2) rectangles together along the short end. Repeat with the second set of (2) rectangles. Optional: Press seams open. Sew these units to the top and bottom of the long sides from Step 2.
Step 5: Adding Final Side Borders
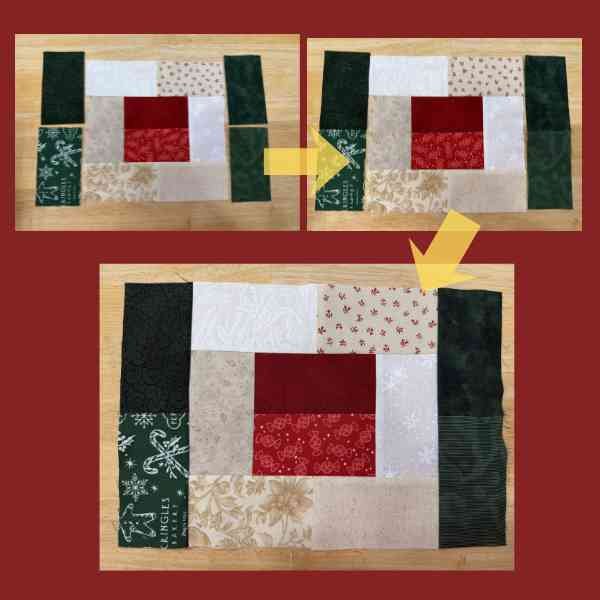
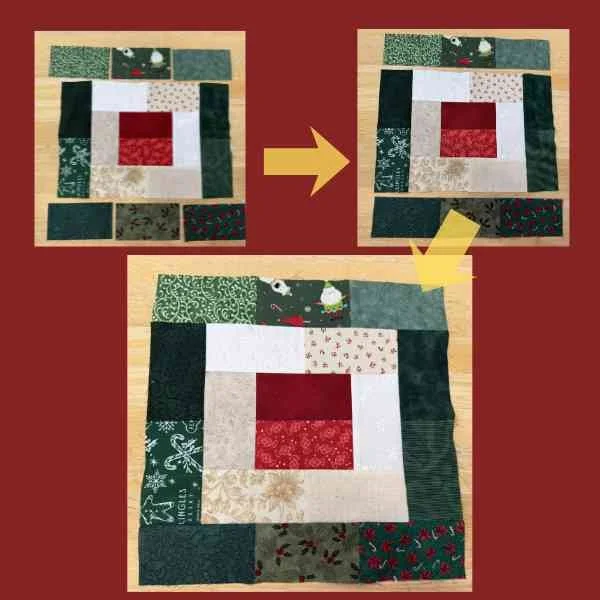
Next, gather (4) green rectangles. Sew (2) red rectangles together along the short end. Repeat with the second set of (2) rectangles. Optional: Press seams open. Sew these units to the sides of the unit completed in Step 3.
Step 6: Adding Final Top Borders
Gather (6) red rectangles. Sew (3) red rectangles together along the short ends. Repeat with the remaining three red rectangles. Optional: Press seams open. Sew these units to the top and bottom of the unit completed in Step 4. Square up the block to 12½’’.
Please let me know if you have any questions! Happy to help!
Happy quilting,
Kris