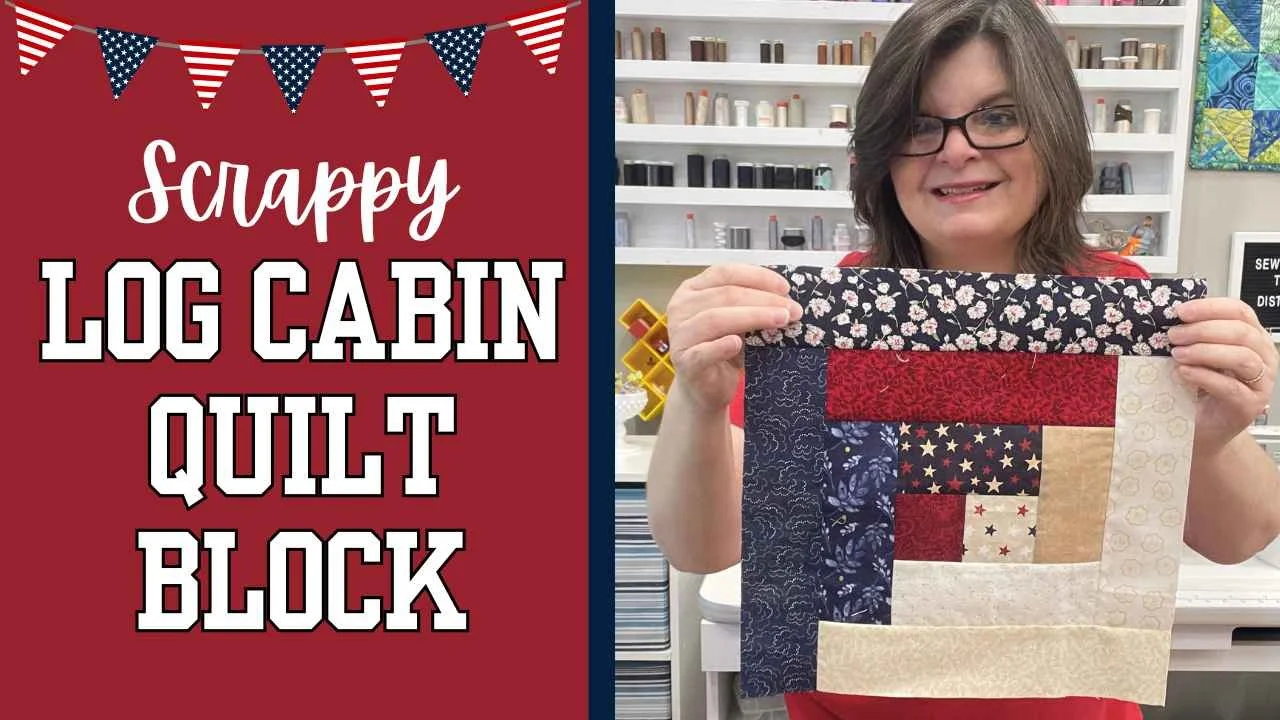
Scrappy Log Cabin Block
Are you buried in scrap fabric? Want to put a dent in it? If so, you are not alone. Most quilters are like us. This block will help you put a dent in that scrap pile. Don’t have scraps? That’s okay! This block will still work.
Click on the image or HERE to watch the full tutorial.
This block measures 12.5” unfinished (not in a quilt) and 12” finished (sewn into a quilt). It is easy, fun, and a little addictive to make. So gather your scraps and let’s get started!
Subscribe to my newsletter and get FREE downloadable Log Cabin Quilt Block Color Sheets to help you plan you next log cabin quilt.
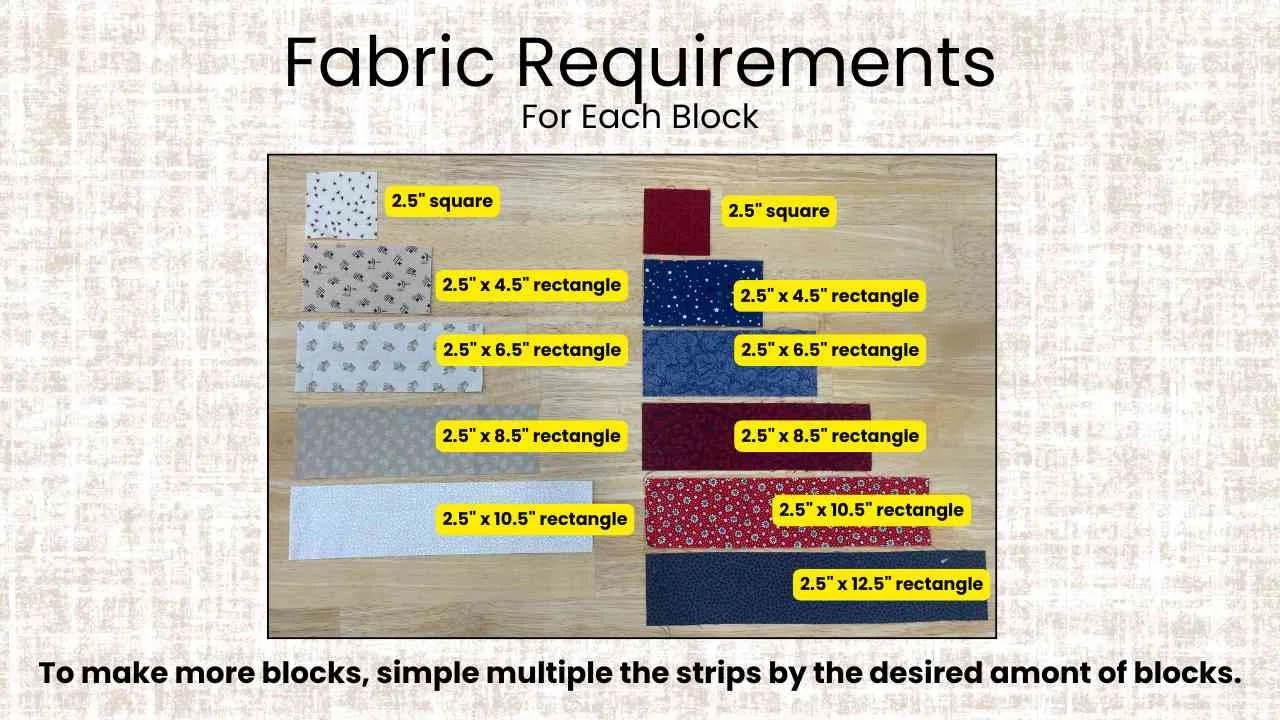
Supply List
This block is made with 2.5” strips, which is perfect for using up those leftover jelly roll strips, too, if you have them. For each block, you will need the following:
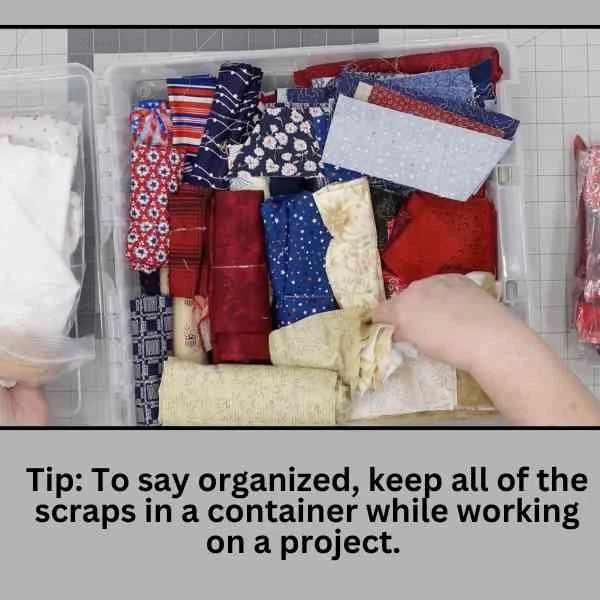
Step 1: Choosing Fabric
Because this is a scrappy project, it can be intimidating trying to pick fabrics, which is why I like to have a few rules going into the project. I talk a lot about this in the scrap quilt tips videos. For example, for this project, my rules are red and block dark logs and beige and white light logs.
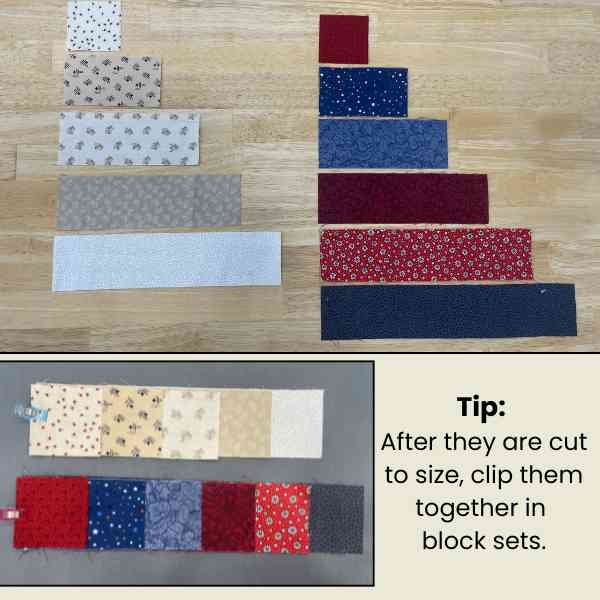
Step 2: Cutting Pieces
There are two ways to do this: 1.) cutting all of the pieces for the block(s) to the correct size or 2.) adding strips and cutting them off after sewing them on. For me (and many will argue!), the best way to ensure a square block, and, in my opinion, have the most success, is to cut the pieces to size. If you don’t have a great 1/4” seam allowance, this is a great way to practice, too!
Step 3: Sewing Block Together
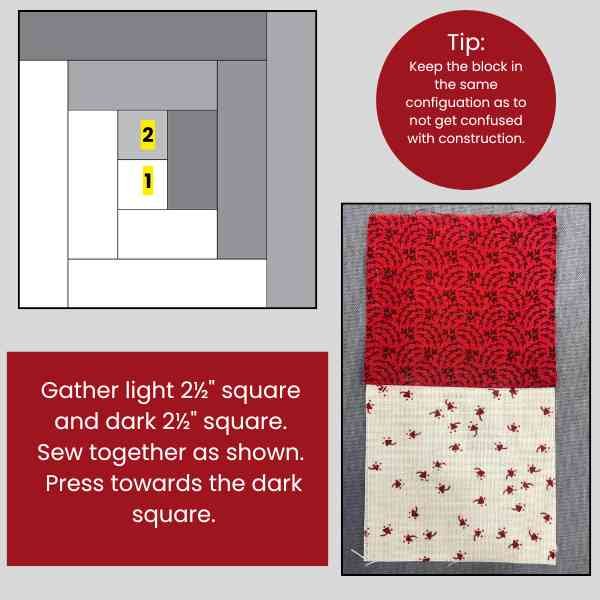
To make this block, we start with the two 2.5” squares. Sew these together as show, pressing towards the darker fabric. Tip: Have a sample block made or a sketch to make sure you are laying out and sewing the pieces together in the correct configuration. I like to have the center dark square facing toward the top of my portable design board. I will keep this configuration throughout the entire assembly of this block.
Adding “Logs” or Pieces
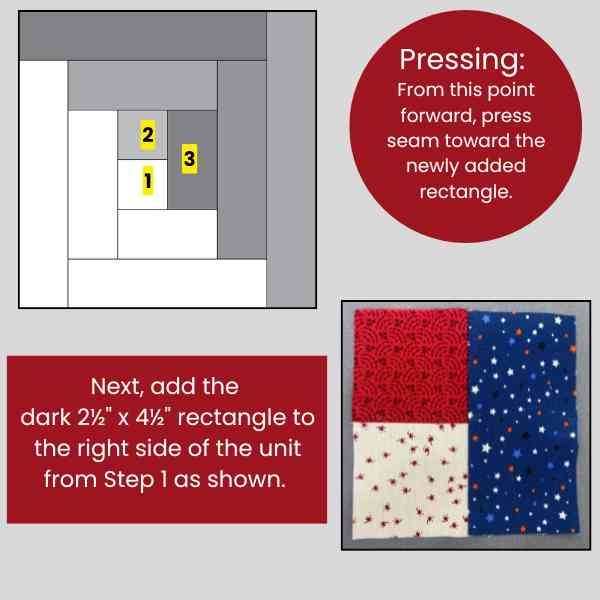
Place the two fabrics that you sewed together in Step 3 on a flat service with the dark fabric at the top and the light fabric at the bottom. Next, add the 2.5” x 4.5” dark rectangle to the right of the unit. It should line up perfectly. With right sides together, sew down the long side using ¼” seam allowance.
Adding “Logs” or Pieces
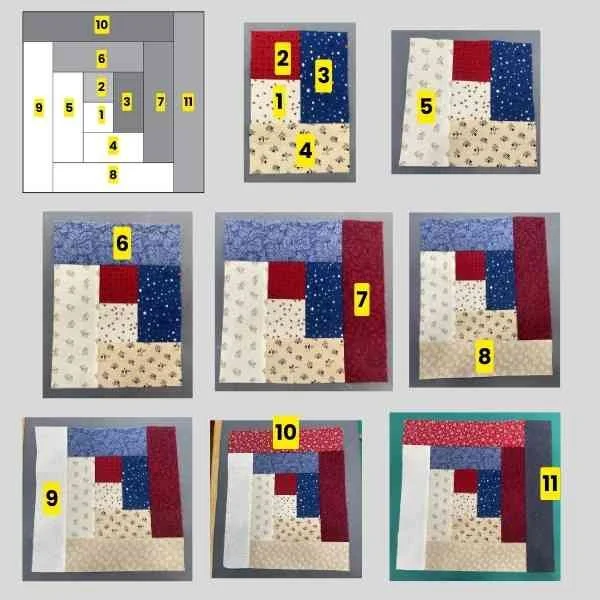
Working in a clockwise configuration, add additional rectangles (or logs). After adding a piece, press seams towards the new piece added. After adding the last piece, press the entire block well. If desired, square up the block to 12.5” unfinished or 12” finished (when it is in a quilt).
Size Chart
As promised, here is the chart that will help you determine how many blocks are needed for different-sized projects.

Please let me know if you have any questions! Happy to help!
Happy quilting,
Kris