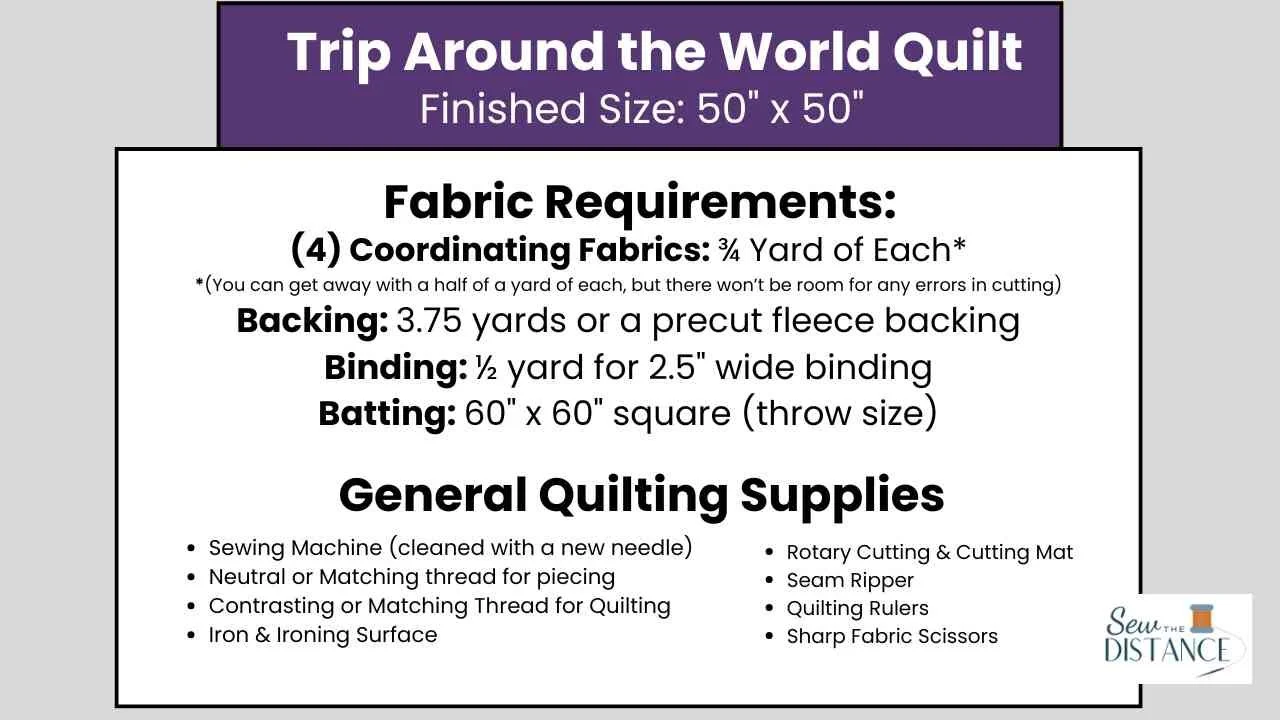
The Walmart Quilt

Click on the image or click HERE to watch the tutorial.
Have you ever wondered if you could make a beautiful quilt without spending a fortune? This project might just change the way you think about quilting.
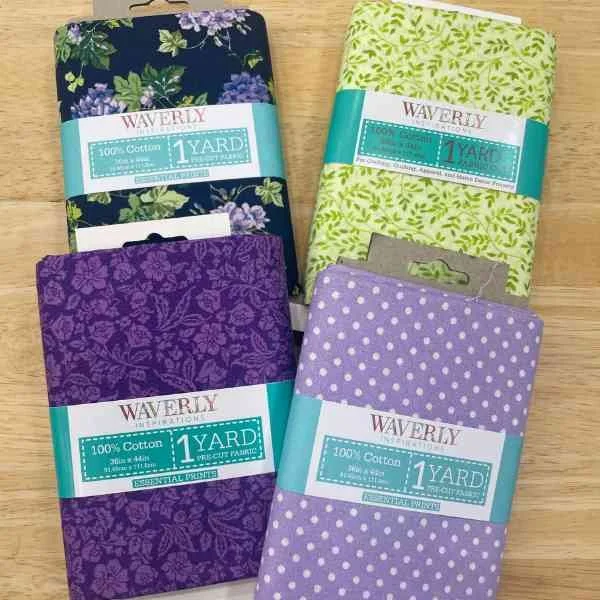
I’m so excited to share what I’ve been calling The Walmart Quilt, which is a simple, fun Trip Around the World quilt made entirely with fabric from Walmart, and the total cost comes in at around $30 for a 50" x 50" quilt! You can, of course, use any fabric for this quilt. I just happened to use Walmart fabric, but it will work with any fabric.
This quilt is proof that you don’t need a big budget (or a perfectly curated fabric collection) to create something you truly love. Whether you’re a beginner, trying to be more intentional with your spending, or just looking for a low-stress project, this one checks all the boxes.
I made my samples in bright, summer-y colors, but the beauty of this pattern is how versatile it is. You can easily change the mood just by switching up your fabrics. You can go soft and subtle, bold and modern, or even turn it into a festive version.
If you’ve got fabric in your stash or you’re looking for an affordable way to get started, this quilt is a great place to begin. Let’s dive in and make something beautiful, without breaking the bank.
Step 1: Picking Fabrics
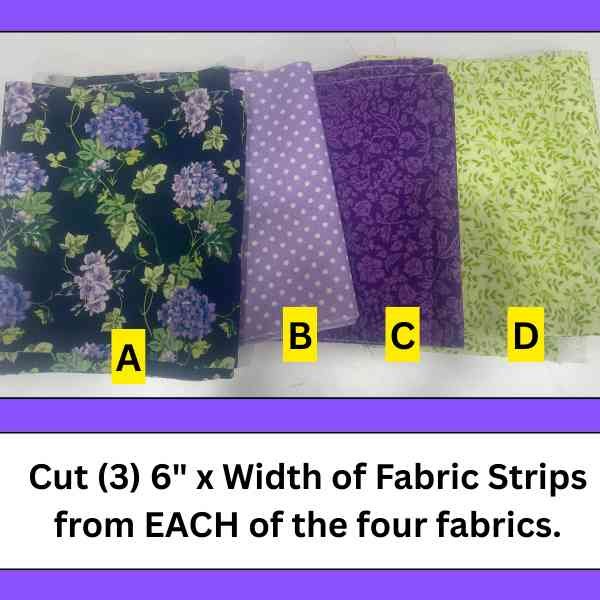
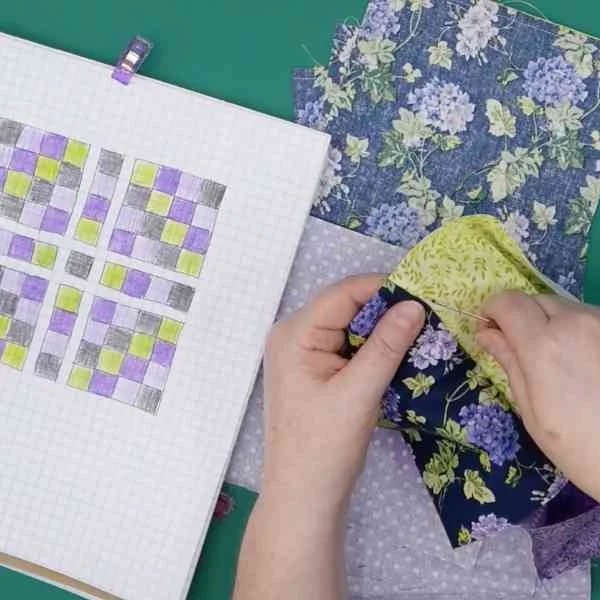
I picked out four coordinating pre-packaged fabric from Walmart for the project I show in this video. When picking fabrics for this quilt project, I like to choose at least one that is a dark fabric. Think of this fabric as the star of the show, with the others acting as supporting characters. This is a great way to do it, but you can, of course, play with the colors and color placement. There are so many opportunities to make this quilt your own. Have fun with either graph paper and colored pencils or with the downloadable coloring sheets I have made for this project.
Step 2: Preparing Fabrics
Press the fabrics well and cut (3) 6” x the width of fabric from EACH of the four fabrics. After these are cut, lay them out and decide on the fabric placemat that you find most pleasing. It helps to sketch it out to get a visual. Once you know the placement you like, label the fabrics A, B, C, & D.
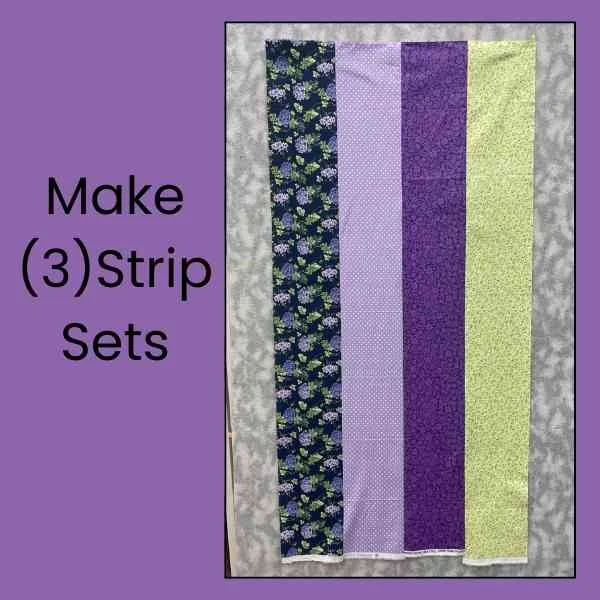
Step 3: Sewing Strip Sets
Following the layout order from Step 2, sew the four fabrics together in order along the long sides of the fabric. Please note: for the loop method to work, you will need a good ¼” seam allowance. If you struggle with this, you can also just cut the strips into 6” squares and lay them out to put them together. This will work, too.

Step 4: Making Loop Sets
To make the loops, fold each strip set in half the long way, with right-sides together, matching up the long edges. Using a quarter inch seam allowance, sew along the edge. This will make a loop. Next, lay the loop strip on your cutting surface, still with the wrong side out. Trim off the selvedge. From the freshly cut edge, measure over 6” and cut. Continue cutting 6” increments. You should get (7) strip set loops from each of the three strip sets for a total of (21) loop units.
Step 5: Seam-Ripping Between Blocks
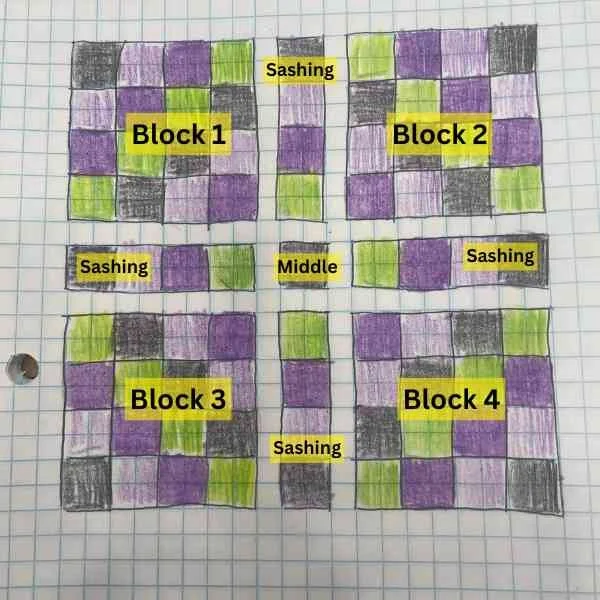
This is where it gets really fun! We are going to make (4) identical blocks. To do this, take four of the 21 strip sets. For one, seam rip between Fabrics A and D. This is your top row of the block. Next, seam rip between fabrics B and A. This is the second row of the block. Next, seam rip between fabrics C & B. This is the third row of the block. Finally, seam rip between D & C. At this point, press the seam allowances open for ease of construction. Sew the rows together to make a block. Repeat steps to make a total of (4) identical blocks. You will have (5) loops sets leftover that you will use for the sashing and center (upcoming steps).
Step 6: Preparing Sashing Strips
Just to make sure everything is lined up, lay out the four corner blocks made in Step 5. These blocks will be rotated as shown. Leave space between the blocks for the sashing strips and middle block. The seam-ripping is easier for the sashing because the strips are exactly the same. For four of the leftover five loops, seam rip between blocks A & D. As for the final loops, rip out both sides of fabric A (between A and D AND between A and B). Layout the units as shown.
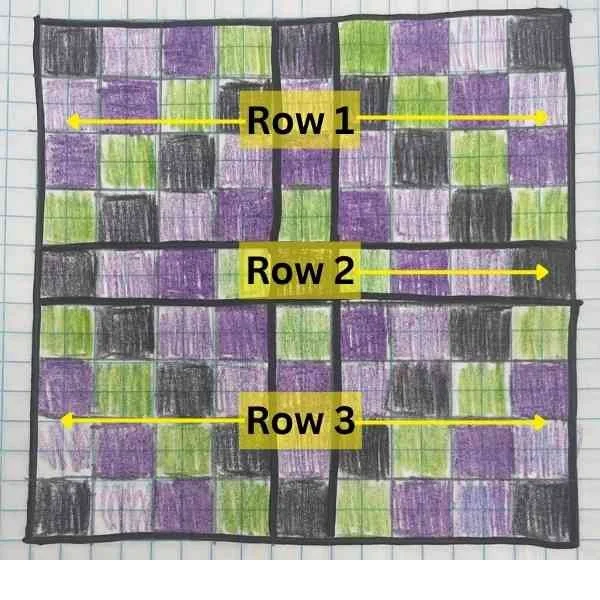
Step 6: Sewing It All Together!
Sew the quilt top together in three rows: Row 1: Block 1, Sashing 1, Block 2; Row 2: Sashing 2, middle square, Sashing 3; Row 3: Block 3, Sashing 4, Block 4. Congratulations! The Trip Around the World quilt top is complete!